A bit unusual this one.
I needed something more controllable than a fine brush. My hands are not as steady as they used to be. I wanted something with a fine nib that didn't move or bend as much as a brush does.
So here is what I made.
It is a simple block of Jenga with a hole drilled in the end. I fitted a small bayonet electrical connector from a set I got from ebay. I bent it a little so I can see what I am doing around the end of the wood block.
It works for me like a fountain pen. Which would have been a great way to do the same thing! If I had one in the house!
I used it to make the Zap symbol on my recharge stations for my Hover Drones. Just make sure the paint on the background is dry before you use it though.
Monday, 4 March 2019
Sunday, 3 March 2019
Robot Drones Started. Using Jurassic World Matchbox Die-cast.
Now I spotted these at the same time as the Subs I previously used.
I kept thinking about the figures from Superfigs Old Glory and their round floating robots.
I grabbed a few as again they were only £1 each from my local Entertainer toy shop.
Next I had the dilemma of how to attach any external bits to a sphere which is mainly made of brittle plastic? Also how to base it in a hover/flight way?
I drilled a small hole in the bottom of the brittle plastic. I had to enlarge it slightly with a sharp knife blade. I found the pointed scalpel blade best for this. I took it slowly and test fitted the rod until it just popped through the hole. The rod I used was a cheap ballpoint pen refill. I left the nib on the end of this. Mainly because it gave a fitting just deep enough to be strong when super glued in place.
Then I had to worry and think of external fixtures. These consisted of: An internal piece of an old VHS cassette. I had enough to do all 3 of the spheres. They do vary from manufacturers. Then an electrical connector part. The type you would use to connect 2 bare wires. I had previously removed the metal interior and |I have blocks of these because the are very cheap and useful. The semi clear white section you can see below.
Another problem was getting these fixed to the side of the sphere. I decided to drill a small hole in the softer plastic on the side of the sphere. Then insert a ball headed pin and superglue it. Then I had a mounting to hang the rest of the external fixtures on.
You can just rotate the sphere until the internal chair mount gets out of the way of the drilling and the pin.
Lastly I attached a small LEGO 1x1 flat plate onto the back of what is the camera mount. Just to seal one end of it. I am still thinking if there is anything else I can add. But may just undercoat then paint them as is. But there will probably be more done later. A lens on the camera. More LEGO I think of the clear variety.
I will use these as base patrolling security cameras. Also I will build recharge columns for them.
Saturday, 23 February 2019
Submarines? Jurassic Park?
I found these Submersibles in my local "The Entertainer" They are from "The Lost World: Jurassic Park" range. I didn't even realize they had made these models. But They were selling them off at £1 each. SO they followed me home.
My idea is to use them as another form of robot drone worker. Possibly hover type. I decided to try various washes over the existing glossy yellow. Just to tone it down a bit.
I may have gone to far with some of them. They look positively filthy!
I used Vallejo Smoke 70-939 first. Then Tamiya Smoke X-19 over that. Some while the first was still wet to see what would happen.
This is Before.
And here is the mess I made.
First one I did possibly came out the best. The one on the upper left of both pictures.
Another type of Gate.
New
Gate Compound Entrance Build
Here I go again! I
started building this, while I still haven't finished the last double
gate yet.
But inspiration goes
where it wants to.
Here the idea was
for a main gate style entrance to a vehicle compound or base style
complex.
It will only fit
smaller military style vehicles. Light tanks or APCs. Sci-fi, Modern
or Post Apocalypse 28mm stuff.
Again I used Jenga,
Kids building blocks and wooden puzzle pieces for the wall elements.
The gate itself is again the Mesh I got from Libbyslounge on Ebay.
Seeing as I had a
bit of trouble with the hinge sections on my last gate. A friend
suggested using paper clips to thread the cut away mesh through. The
only ones I had were plastic coated and far to hard to bend into the
small eyelets I would need.
Adapting the idea a
bit. I dug out some staples. Cut them in half across the top of the
staple and bent the 90 degree angle a little bit more. Then I drilled
holes with a pin vice drill and fitted the staples into the holes
forming the eyelet. I made sure they were at the right height to fix
the gate mesh at the right level. Super glued the staples. Waited for
that to dry completely then fitted the gates. Easy. Just cut through
the edge of the mesh in two places lining up with the hinges. One cut
blade width and you can pop the eyelets through the cuts into the
gate mesh.
The right hand gate is still a bit tight. But I expect that to be less of a problem later.
I will probably painting this in a concrete grey. Mesh of course will be metallic in some form. I may even spray it a Blue or Red then drybrush the gate with metallic to give it a worn look.
Saturday, 16 February 2019
I started another Gate. More conventional this time.
After my Portcullis style gateway. I decided to have a go at another more conventional style double gateway.
Again I went through my wooden puzzle bits box. I found myself a base. Made out of a Domino slide box top piece which I covered in the sticky address labels. Then glued various bits of mixed brain-teaser and Jenga blocks to. Some dominos were also added with their backs facing outwards.
I had some thick card as well, which I cut into random shapes for broken masonry.
The gates are again the 7 point canvas mesh. No measurements just what looked right to my eye.
The hinges came from another ebay provider of electrical connectors parts. Loads of them for about £2.
I just cut into the plastic canvas and removed a small amount of the mesh allowing an outer bolt I could thread into the connector housing. This works as a hinge. Though it is a little to tight for opening the gate properly. I will tinker.
Here is the start at the moment.
And here is the first gate more in Situation. Though I can obviously use it anywhere with my other Jaffa Walls and Temples.
Ebay and Libbyslounge.co.uk for the Mesh . 7 point Plastic Canvas.
https://www.ebay.co.uk/itm/254079761039
Thursday, 14 February 2019
Great Resource for Mesh and Grill on Ebay.
After I had ordered from Ebay for my Portcullis material.
I contacted the seller. WWW.libbyslounge.co.uk
I asked if they did bigger sheets of the same material. I explained what I did and how a lot of my friends were interested in this useful canvas material.
They do much bigger sheets and in 10 packs for free P&P at the moment. UK only and Second class post!
Again if you order a few the price is much cheaper per pack of 10 sheets.
If you are thinking of doing a lot of Mesh or Grill work for flooring this would be Ideal!
Plastic Canvas Trimits 7 Count Clear 27 x 34 cm. ** 10 Sheet Pack** costing £12.50 for one pack or if 2 or more packs are purchased it drops to £11.88.
Here is a link to Ebay. I hope it works.
https://www.ebay.co.uk/itm/254079761039
I will be getting more of this as soon as I can afford it.
Give it a look. Very useful stuff.
New ruined Gateway Finished. Plus useful item to have.
Here is my Ruined Gateway and Portcullis style gate.
Earlier on the Blog I showed this build. I have been awaiting some suitable grill or mesh to use as the Portcullis.
I found some on Ebay in the end.
WWW.libbyslounge.co.uk
It was £8.07 with free p&p. Mainly because I decided to get 3 packs. I thought it may be useful.
I was right.
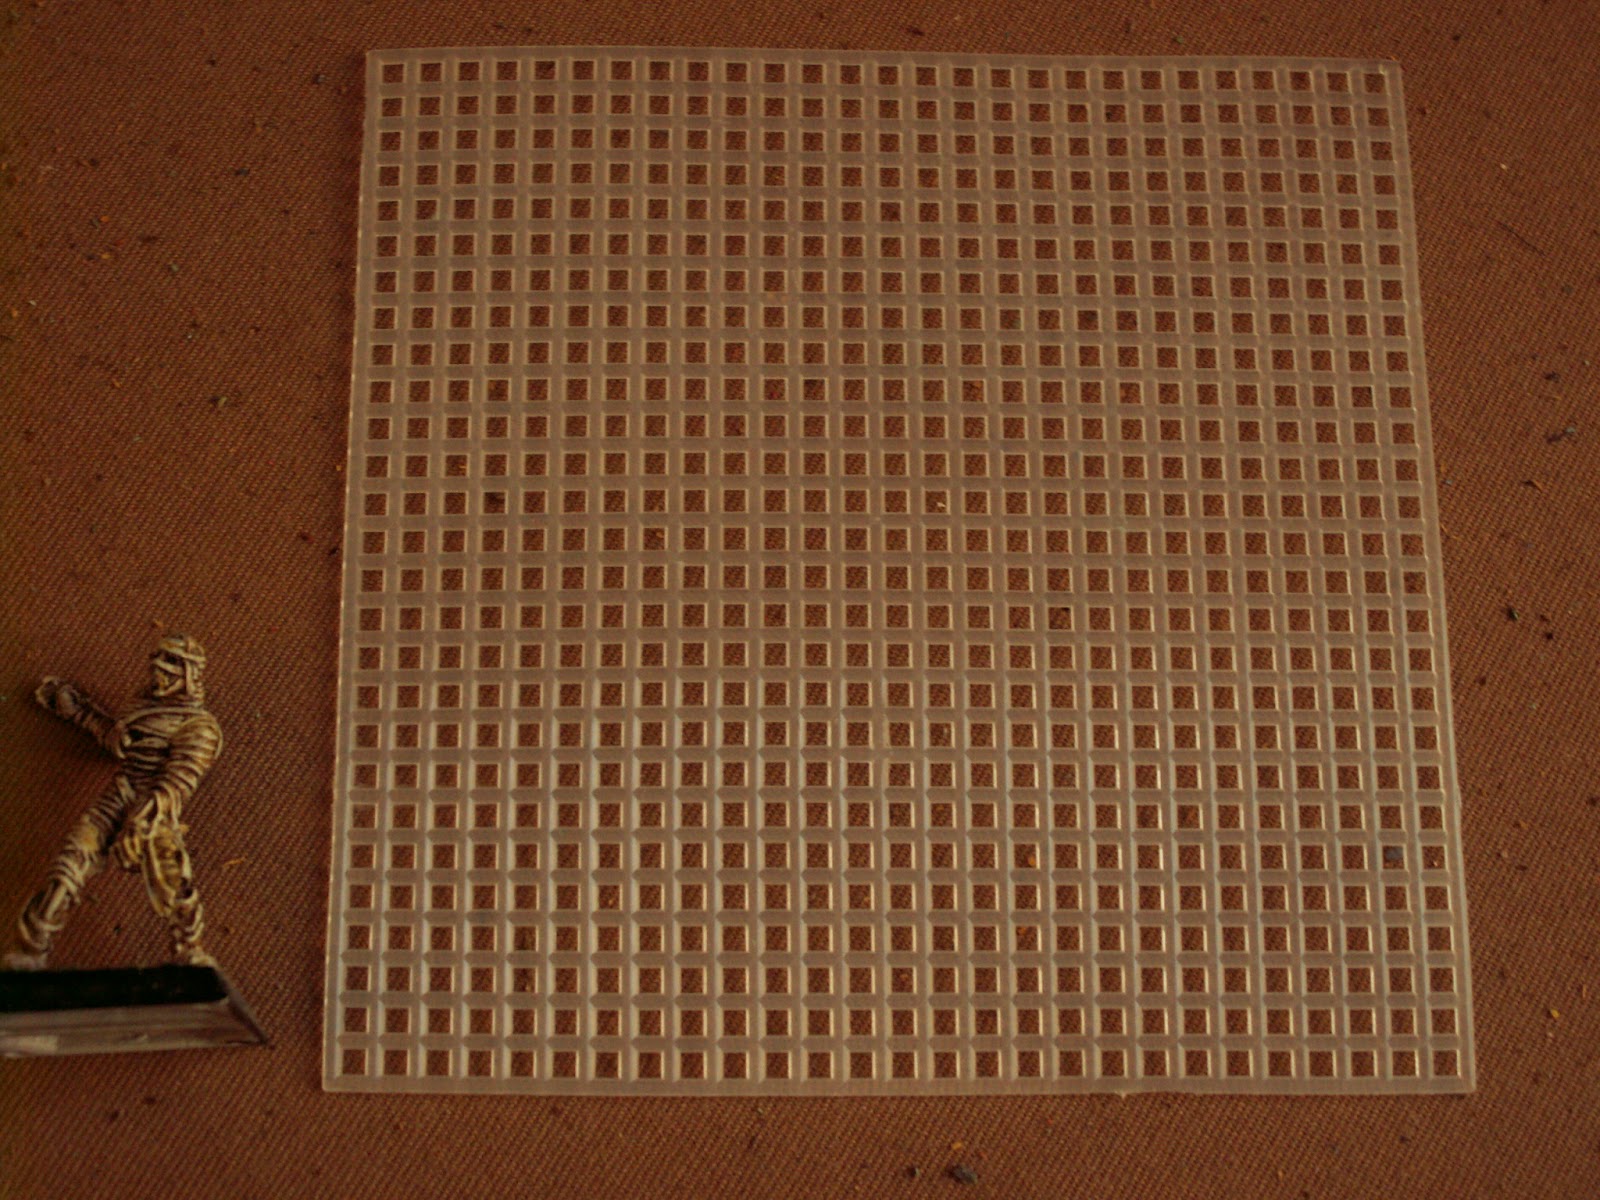
Would also make great flooring for Aliens scenarios. It is a soft polythene plastic. But robust enough to take the paint and support it's own weight plus a bit more.
Only 4" by 4" or 100mm x 100mm squares. But you get 5 per pack. I ended up with 15 of the squares.
Anyway. Piccies.
This is the 4" 100mm square 7 Mesh canvas before I cut it down. Search for that with Plastic added in on ebay. You should find it easily if you are interested.
I am definitely going to grab more of this. If I can find it in larger sheets. Great!
Subscribe to:
Posts (Atom)